


While the power of pictorial storytelling is magical we’ve got a long way to go before text is extinct.
Which means you better learn how to use fonts effectively in your visuals or you’re going to be looking straight down the barrel of obscurity.
TYPEFACE vs. FONT
Right out of the gate I need to clarify a common mistake.
The correct term to use when describing lettering is ‘typeface’ and not ‘font’.
Typeface is the actual character set. {i.e. Arial, Times New Roman, Century Gothic, etc}
Font is the specific size and style of a typeface.
For example: While Arial, is the typeface, Arial 10pt bold is the font.
Here’s the deal: Since this article is for non-designers and most of us are more familiar with the term ‘font’, I’m going to use ‘font’ and ‘typeface’ interchangeably….BUT, consider yourself edumcated! (yep, you read that right!)
ANATOMY OF A FONT
You can’t use something right until you understand how it works. So let me introduce you to the anatomy of a font.
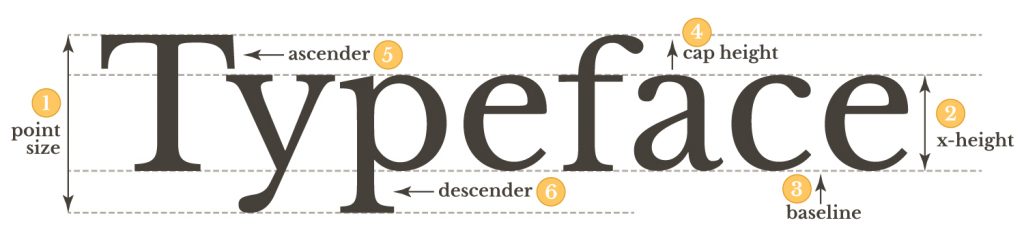
There are five main elements of a font {typeface}…
1. The point size refers to the total height of a font
2. The x-height refers to the distance between the top and bottom (or baseline) of a lowercase letter
3. The cap height refers to the distance between the top of the lowercase and the top of the uppercase
4. The ascender is the portion of the uppercase that ascends from the cap height line to the top of the lowercase
5. And, the descender is the portion of the lowercase that descends past the baseline.
TYPES OF FONTS
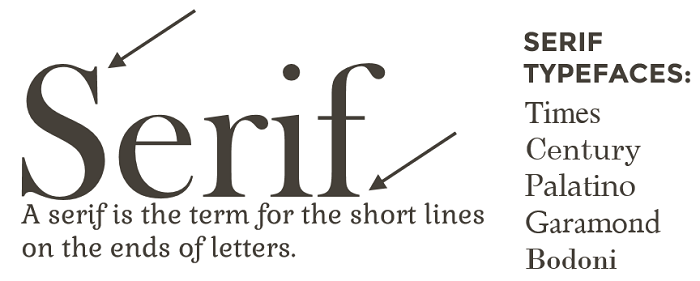
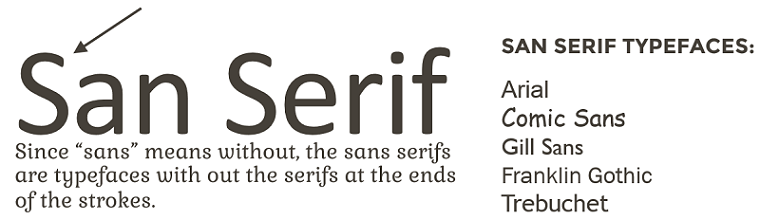
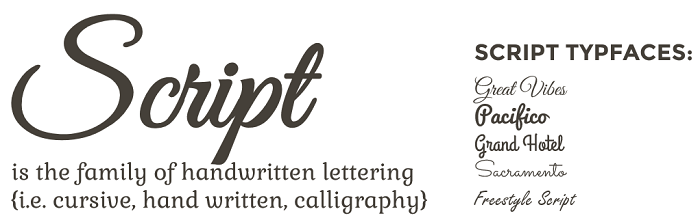
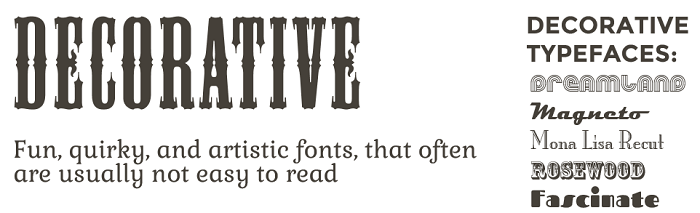
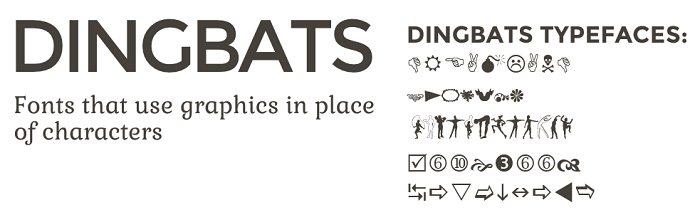
There are five font categories: serif, sans serif, script, decorative, and dingbats.
TRUETYPE VS. OPENTYPE FONTS
All fonts come in either a TrueType or an OpenType format.
The definitions for these are dry tech stuff that I barely understand, but the gist of it is this…
TrueType is the original format of text that was created by Apple and later licensed by Microsoft.
OpenType is the most recent font format that has been jointly developed by Adobe and Microsoft.
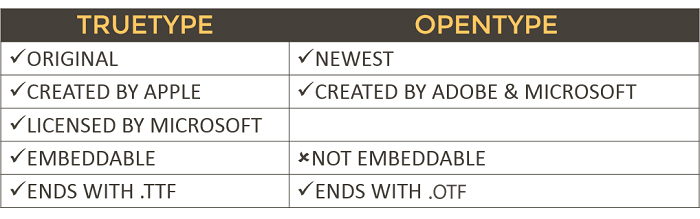
To tell what format a font is you can look at the extension, meaning the .ttf for TrueType and or the .otf for OpenType, which appear at the end of the font name when you’re downloading it.
OR, you can click the font drop down in any Microsoft or Apple software and it will have an ‘O’ or ‘T’ on the left side of the font name as you can see in the two circled selections here.

Now that you know the anatomy of a font and the different types of fonts, let’s dive into how to use fonts the right way in your visual content.
Here are 8 techniques and best practices to aid you in using fonts effectively in your visuals.
1. FONT LOOK & FEEL
Selecting fonts is certainly not an exact science. Some may even argue it’s a bit subjective.
The best approach for font selection is to focus on matching the “feeling” of a font with the feeling you want to provoke with your visual.
For instance in this example I’ve chosen a font that conveys the feeling of the word and one that conveys the opposite feeling of the word.
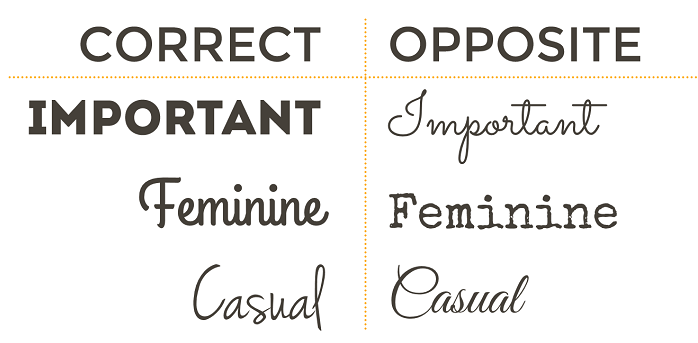
The next time you’re choosing fonts use this comparison exercise to test out the compatibility of fonts with your desired feeling. You’ll be amazed how instantaneously you will be able to spot the right and wrong fonts.
As you get more experience with fonts selecting them will feel less like a shot in the dark and more like a home run.
2. COLOR MATCHING FONTS
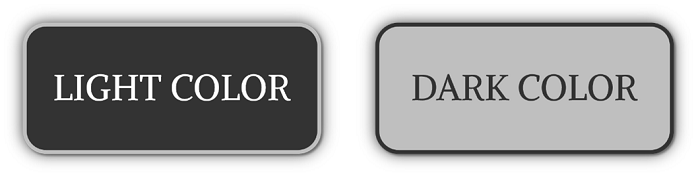
The basic coloring rule of thumb for fonts on photographs, images and graphics is that light photographs should have dark text, while dark photographs should have light text.
Which is why every branding color palette needs to have a dark hue and a light hue that can be used specifically for text and backgrounds.
A great way to choose the color of your font when placing it on top of a photograph is by pulling the font color directly from the photograph itself.
You can do this using the eye dropper tool that’s available in many image creation tools {including PowerPoint}, or with Colorzilla, a Firefox and Chrome plugin that has a color picker tool you can use to pull the color off of anything on the web.
To use Colorzilla all you need to do is hover over the photograph until you see the color you want, then click to capture the color.
Pulling font colors from the photograph the text is going to be placed on will help you tie the text to the overall design. This technique will prevent the text from looking haphazardly thrown over an image.
Here’s an example of this color matching technique.
3. FONT PLACEMENT
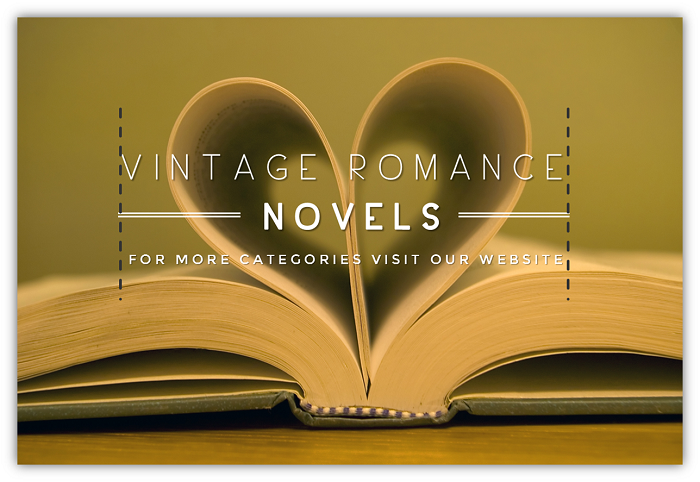
The best technique to guide the placement of text on an image is to create a box out of your text.
Meaning, make the beginning and end of each line of text start and finish at the same spot by playing with the font sizes on each line of text.
As you can see in this image a great way to do that with shorter words that you don’t want to make larger is to use lines.
4. SAME FONT, DIFFERENT STORY
A common misconception about fonts is that you need to use different ones to create interest and to highlight specific words in your image, but that couldn’t be farther from the truth!
The truth is…
The easiest way to make sure your text isn’t too busy or distracting on your image is to use ONE font throughout.
A big part of that misconception is the false belief that using the same font makes everything boring and that it’s impossible to highlight important text if it’s the same font as other less important text.
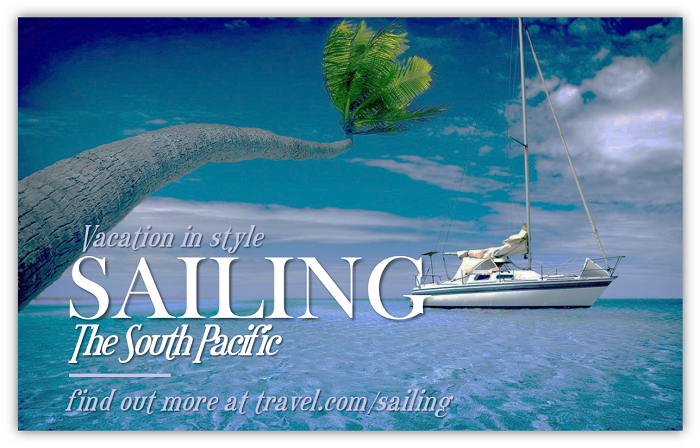
Here’s an example of an image I created that has just ONE font:
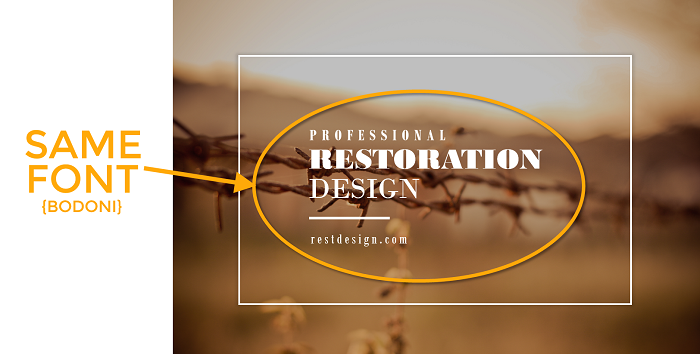
The key to using one font effectively in your images is to use different capitalization, thickness, sizes and spacing for the different lines of text.
One way to do that without the need for manipulating text is to use a large font family for your font selections.
5. FONT FAMILIES
When selecting fonts for your images and your overall branding it’s important to keep in mind that the number of fonts vary in a font family.
For example, the Merriweather font family comes with 8 font versions, whereas the Play font family only has two.
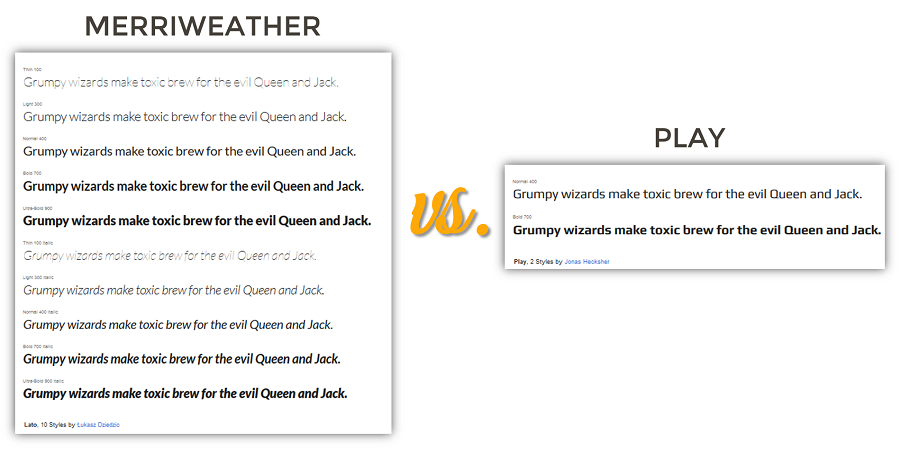
This doesn’t mean you shouldn’t use Play or any other smaller font families!
The benefit of using larger font families is the ease in varying font thickness and spacing. {EXAMPLE} The image in #4 above was achieved using the Bodoni font family.
6. FONT KERNING
Kerning refers to the spacing between characters in a font. Each font comes with its own default kerning.
Meaning, each font’s spacing is controlled by the designer who created the font. Although kerning can be manipulated with certain software {i.e Adobe products, PowerPoint, etc}.
Below I’ve used two different serif fonts both at 28pts.
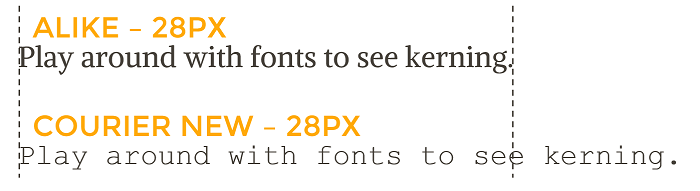
As you can see Courier New is much longer than Alike, which is because of the difference in the default kerning.
Here I’ve used the Alike font on the first letter and the Courier New font on the second.

As you can see the point size {the distance from the top of the letter to the bottom} is also different for these fonts when at the same 120pt size.
Many image creation tools have a spacing or kerning feature that will allow you to adjust a font’s spacing, but keep an eye out for kerning when you’re making your font selections.
7. USING TRANSPARENCY
A great way to make text really pop on a photograph is to reduce the transparency of the photo.
Here are two versions of the same image…
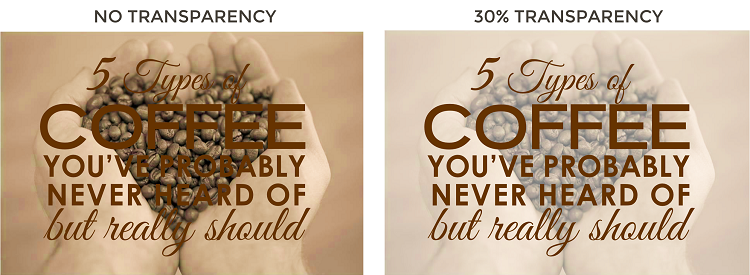
The first one has no transparency and the second one has a transparency of 30%, which as you can see really makes the text pop.
This technique is great to use when you want the text front and center and the photograph as a secondary focal point.
8. FONT PAIRINGS
The art of pairing fonts gives many non-designers a wicked case of ass sweats and I’d venture to guess that’s because they don’t know font pairing best practices.
Here’s an easy to devour font pairing cheat sheet…

Both serif and sans serif fonts can be paired with any type of font, whereas script and decorative fonts can ONLY be paired with a serif or sans serif font.
Use these guidelines when making your font pairings, it’s really that straight forward!
WRAP UP
Don’t forget to pin this post or bookmark it so you have easy access to this font badassery anytime you need a refresher.
Ooh, and let me know which technique or font pairing you use OR, even better, tag me on social media so I can see the awesome with my own eyes, and celebrate how you put your fonts to work for you.
I’ve got my hand stinging high five locked and loaded, so don’t leave me hanging!
ONE MORE THING before you go (you’re going to la la looove this)…
GRAB YOUR FREE COPY OF
THE QUICK & DIRTY GUIDE TO BRANDING FOR SOLOPRENEURS

This 25+ page ebook is a bloat free recipe that will help you gather, prepare and assemble ALL six main ingredients you need to create a unique AF brand identity your peeps will love eye guzzling.
PLUS, the entire ebook is loaded with tons of exercises, resources and examples, so you’ll have everything you need to start creating your brand identity TODAY, regardless of where you are in your business.